how to draw 3d art instructions

If y'all wanna learn more almost portrait drawing, bank check out my "Portrait Fundamentals Made Simple" class.
Information technology'south a very beginner-friendly class that walks yous through all the nuts of portraiture, from constructing a basic head, facial proportions, drawing the features, and finally drawing a realistic portrait step-by-pace.
Click Here To Larn More!
Lesson Details
Hi, this is Ethan Nguyen for My Cartoon Tutorials.com and in this video, I'm going to bear witness you how to draw a 3D hole optical illusion. Here's what the illusion volition look like. 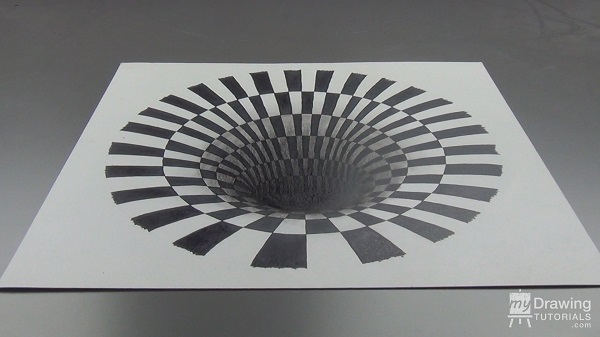 Now let me show you how I did it.
Step 1 – Drawing the Ellipses
The outset stride is to draw a big ellipse. The remainder of the drawing volition be done in ink, but I will draw this first ellipse in pencil because we will be erasing it later. 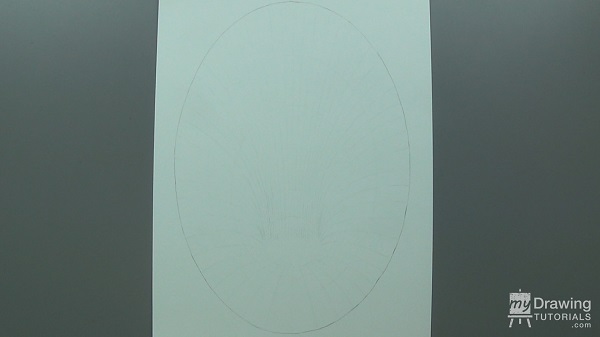 Next, depict a smaller ellipse inside the starting time one using ink. You'll desire to brand this one slightly shorter and more rounded. And instead of placing it right in the center, move it down slightly.
 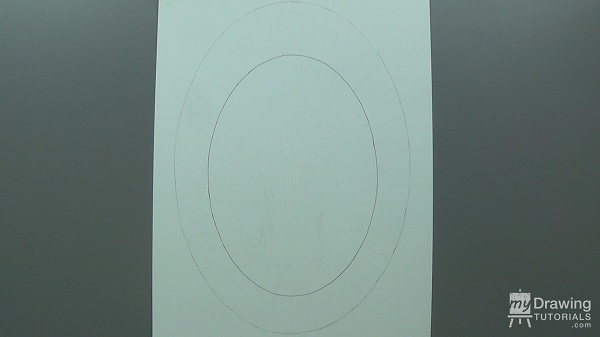 By the way, I made a light pencil sketching of the entire drawing earlier mitt and is at present simply going over information technology with ink. That fashion, the drawing procedure will be a lot smoother and you lot won't accept to meet me erasing and re-drawing a bunch of times. But when you're drawing this yourself, don't be afraid to change things around a agglomeration of times to go the curves only right. Then draw another smaller ellipse inside this i. Over again, yous'll want to brand it more rounded and identify it closer towards the bottom.
 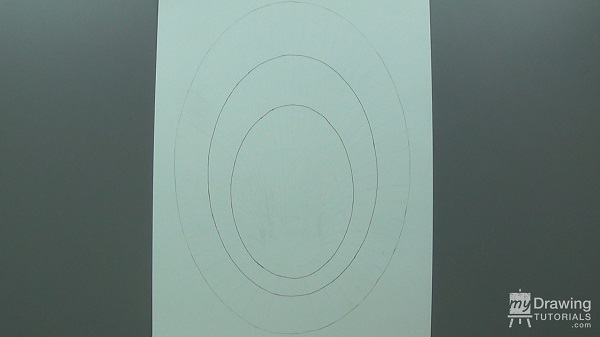 Repeat this procedure three more than times.
 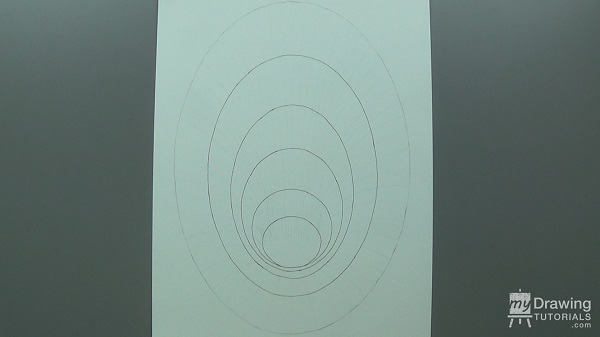 You tin can see the pattern very clearly hither. Each ellipse is a trivial more like a circle and they grouping together at a single point.
Step ii – Drawing the Tiles
Side by side, we're going to depict some directly lines from the center outward. 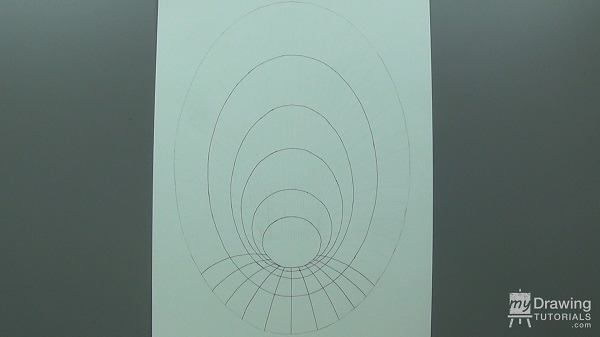 The gaps betwixt these lines volition be widest at the bottom and gradually narrow every bit they move upwards. To aid planing out the spacing and brand them more consistent, I similar to start at both ends at the same time. That fashion I'll accept a good idea of how wide the stripes at the elevation volition be and programme appropriately.
 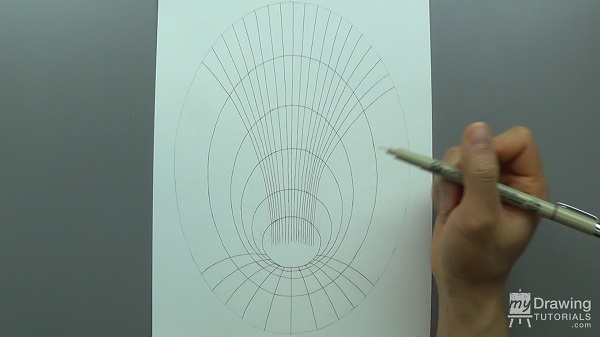 Ane important detail is to make sure you lot stop up with an even number of stripes. Y'all'll see why this is important in a minute. Once we take all the stripes drawing in, allow's erase the outer near circle.
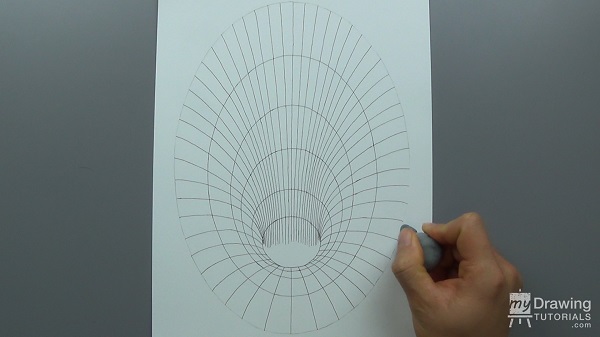
Step 3 – Inking and Shading
Now, we'll use a sharpie marker to fill up in the outer circle using an alternating design. This is why it'due south important to have a even number of stripes. If the stripes were odd, it would throw the pattern out of sync. 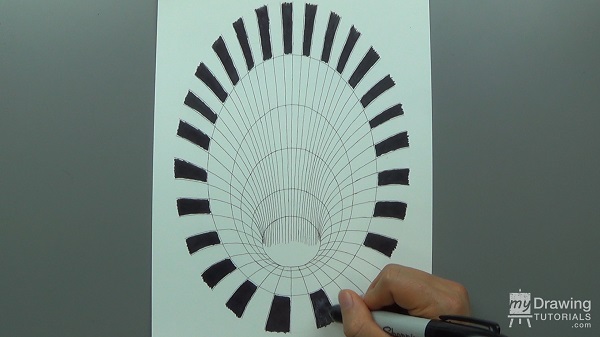 The large sharpie mark won't exist able to colour in the squares all the way to the edge, and so nosotros'll just go every bit close to the edge as nosotros can for at present. Continue doing this for all the circles.
 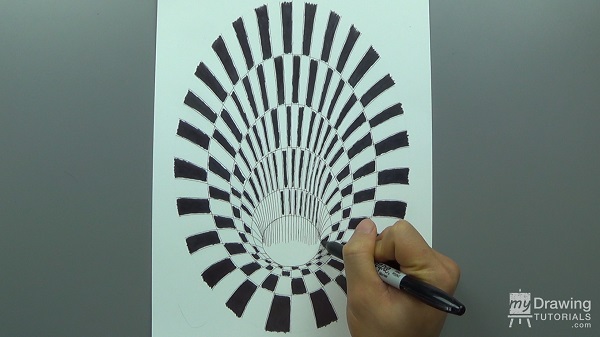 At present, permit'south take a smaller pen and make full in the small gaps that we couldn't get with the larger marking.
 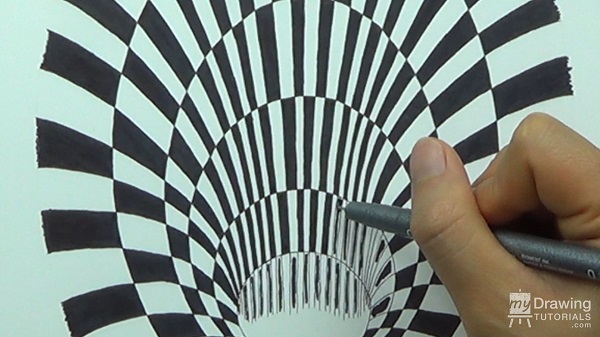 The last step is to create a dark gradation at the center pigsty. I'll use a 9xxb graphite pencil to put in a base tone. You also can use a 4B or 6B pencil for this.
 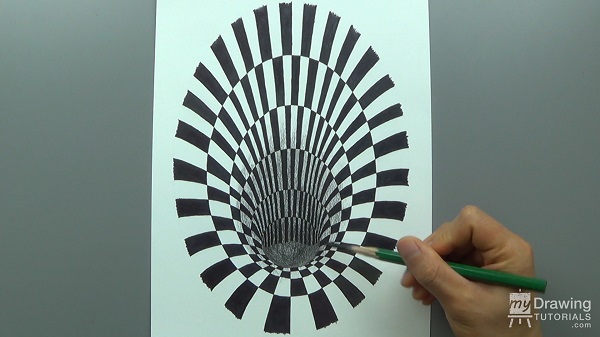 And I'll utilize a blending stump to shine out the tone.
 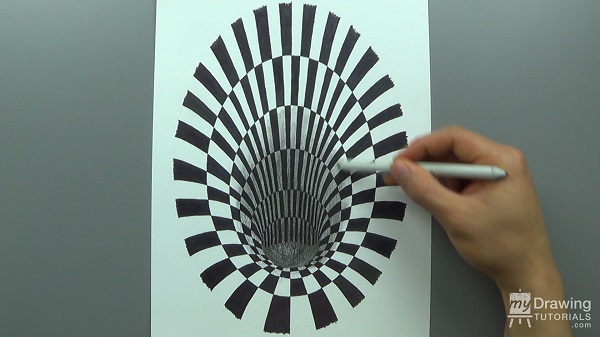 And now I'll utilize a charcoal pencil to put in a actually dark layer for the hole.
 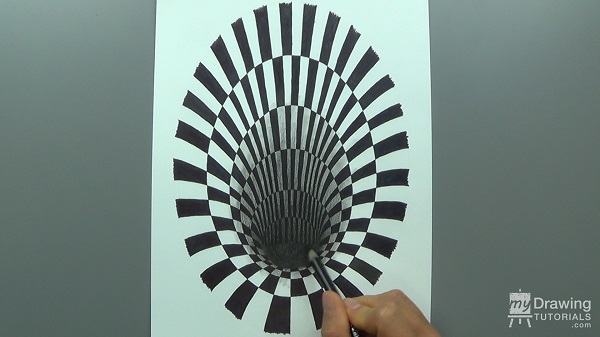 And that'south it! Now all we have to exercise is await at this drawing at an bending to see the 3D optical illusion.
Source: https://mydrawingtutorials.com/how-to-draw-a-3d-hole-optical-illusion/
0 Response to "how to draw 3d art instructions"
Post a Comment