how to draw 3d in bluebeam
Understanding the effigy
To draw a pose correctly, you don't demand to always carry an anatomy book with you. It's not as difficult equally it seems: ascertainment and practice are your best tools. If at any point you get curious about trying something new (which I hope you do), it never hurts to take a wait at that anatomy volume.
Even if your drawing style is far from realistic, the aspects that make a pose interesting and credible remain the same: strength, rhythm, activeness lines, construction and perspective.

Observation:
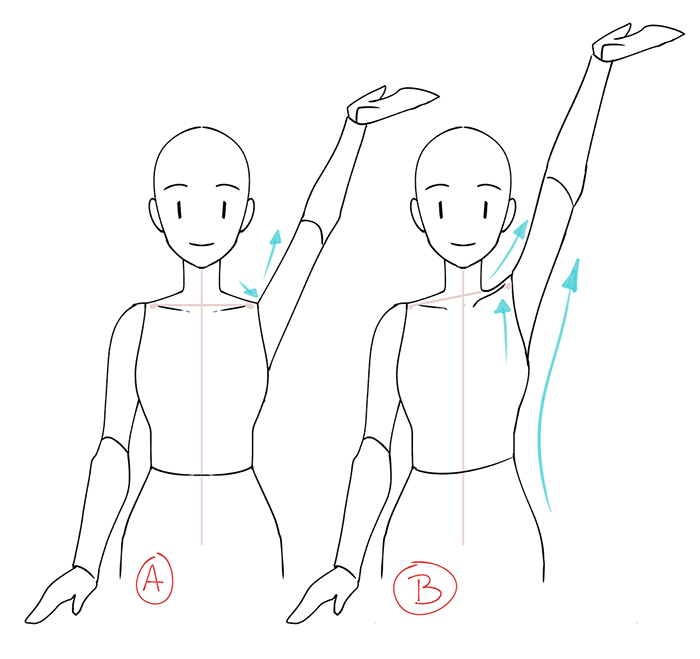
Your closest reference is yourself. If you lot wait at yourself in front of a mirror and beginning moving, you volition detect that your body works as a unmarried element.
When you enhance an arm, the arm is not the merely part of your body that moves, unlike how the removable extremities of dolls piece of work. The changes in your torso don't resemble figure A, right? For example, your shoulder also lifts, and many other parts of your torso adapt to the movement every bit in figure B.
This is what observation means: paying attention to the details and characteristics of the torso.
Strength and rhythm
Your characters motility thanks to their inner strength. They can walk, jump, trip the light fantastic toe… whatsoever comes to listen! But unless they are floating in space, information technology is not the merely strength that acts on them, every bit gravity makes their feet stay on land.
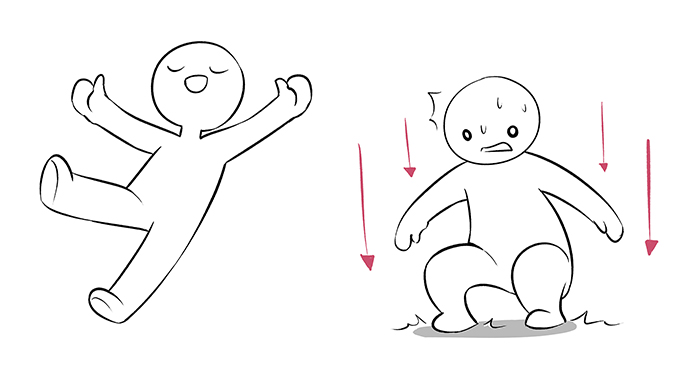
When 2 or more forces interact with each other, a rhythm is gear up, which provides residuum and sense to the movement.
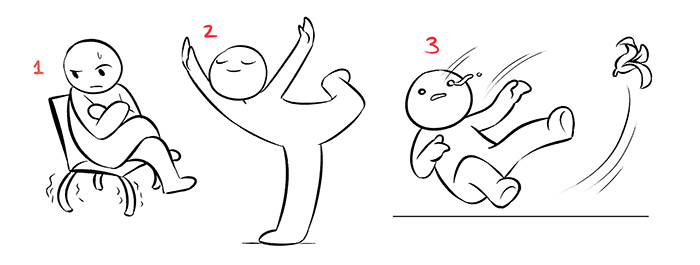
If your grapheme is pushed to the left, his body will fall in that direction (A), unless he puts upward resistance to stand (B).
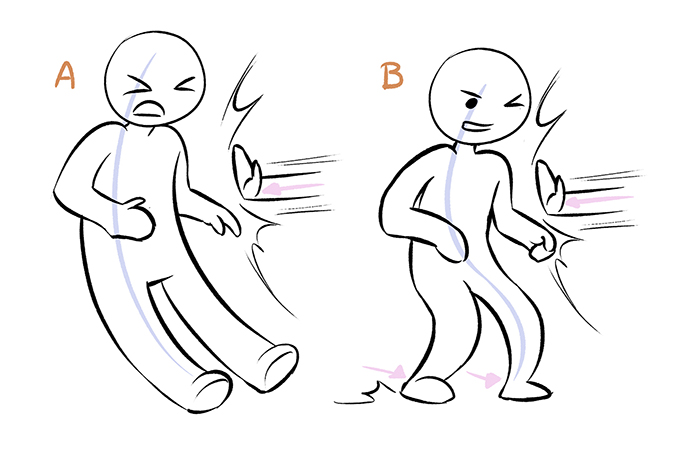
If the grapheme wants to pull something that refuses to motion, his body will lean in the contrary direction. Obviously, in one case the cat gives in to the force, your graphic symbol will fall, as the cat was what kept him continuing.
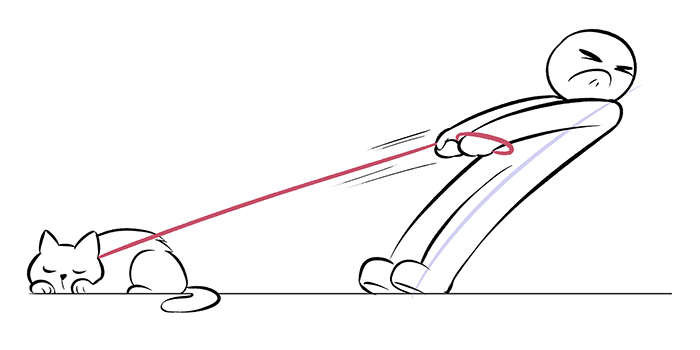
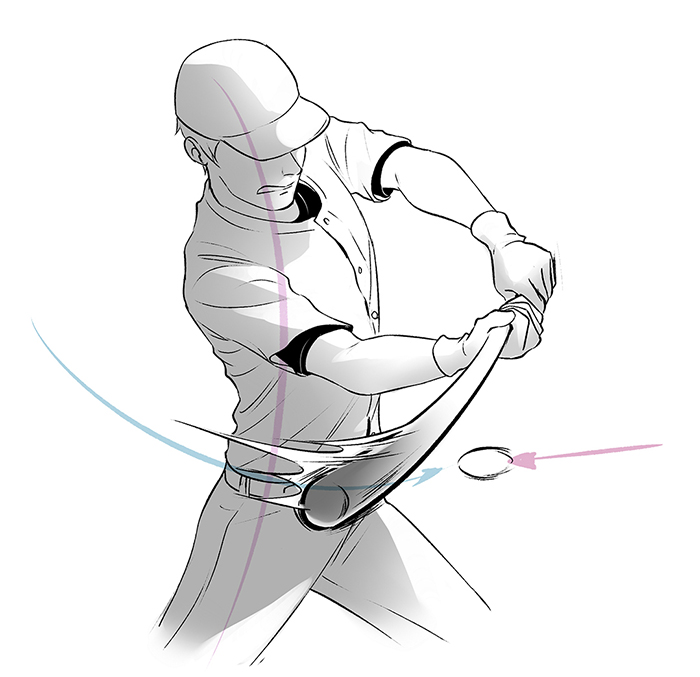
Strength and rhythm provide a lot of visual data yous can work with: the weight of your character (1), the balance of his pose (two) or the lack of it (three).
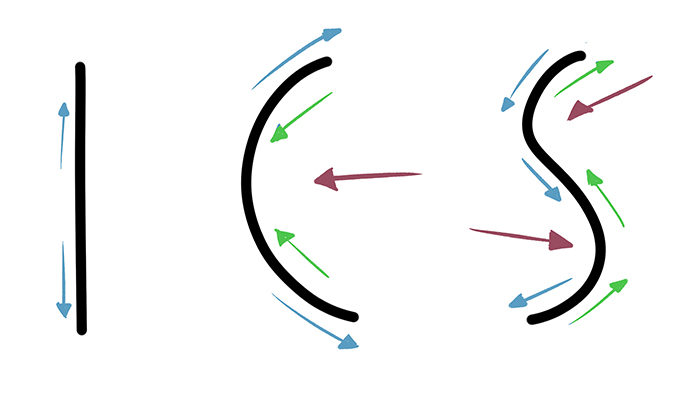
Activity lines
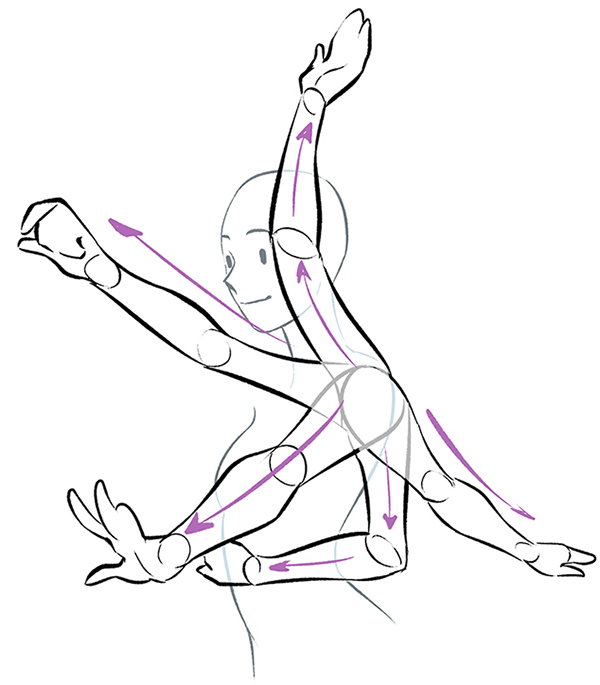
The action line is the imaginary guide that indicates your grapheme'south motion. Information technology focuses on actions and helps to unify the whole figure.
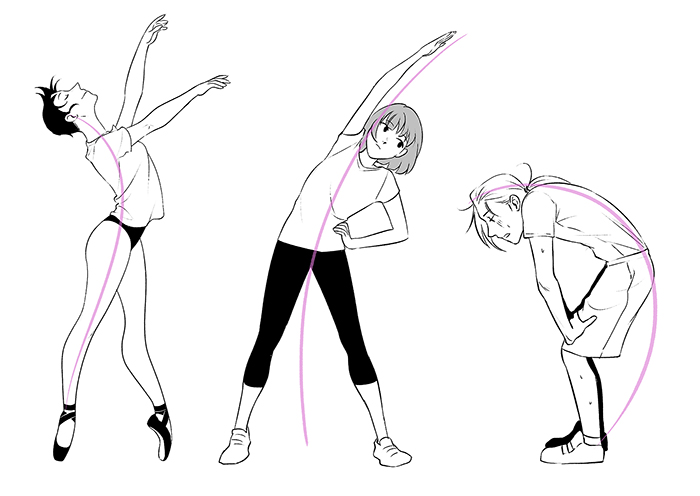
Below you can see a couple of examples where strength, rhythm and action lines interact together.
Example ane:
The character (1) has a relaxed opinion, resting on her correct arm. In the figure (2), we tin run into her action line, which covers her whole body up to the pes. The shape is slightly similar to an S.
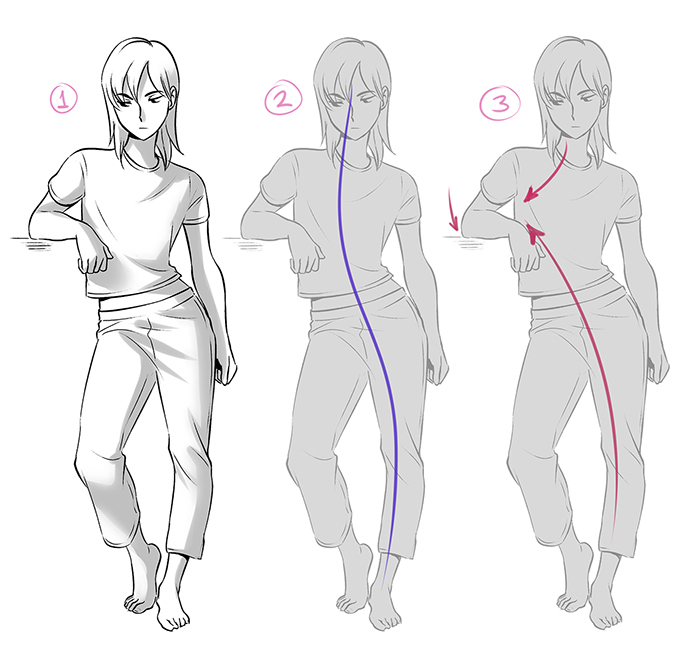
Nosotros can see it is a relaxed pose considering her weight rests on a single bespeak (3) and all she needs is to keep the balance with her left foot, which remains taut while the right one is resting.
Example ii:
The side by side pose is more than dynamic, so at that place are more things going on in this image.
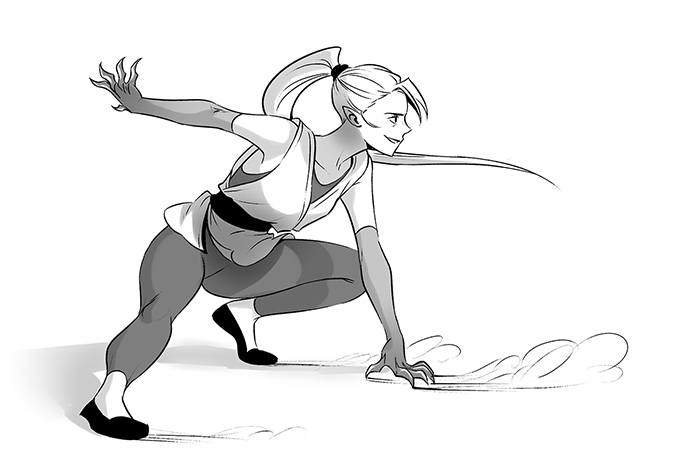
This time you can see 3 activity lines, but the most important are (1) and (2), the ones that actually tell the story. The kickoff one covers the whole figure from head to toe, and the 2nd ane goes in the opposite direction, keeping the balance and forming an X. The third one only provides greater stability to the pose.
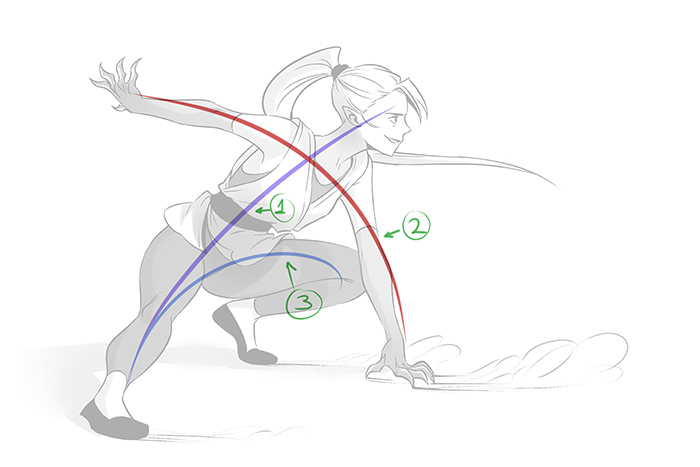
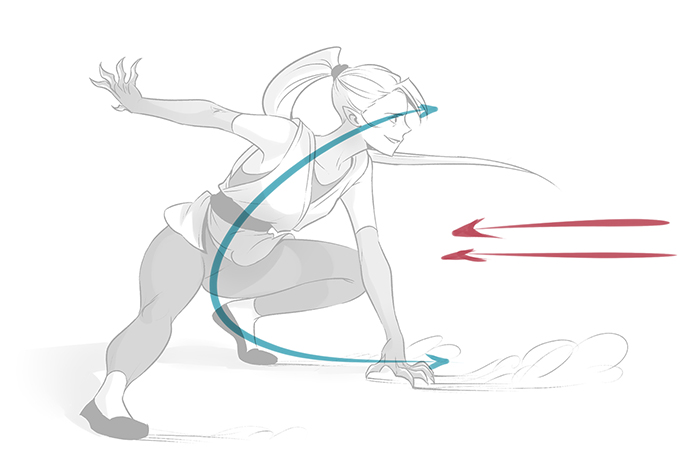
In this drawing we can see that in that location is a force that pushes the character in the opposite direction to her gaze. Elements such as the pilus, the clothes and the dust on the floor propose that the force comes from the right side, and as these elements are lite, they are affected past the speed with which this force acts.
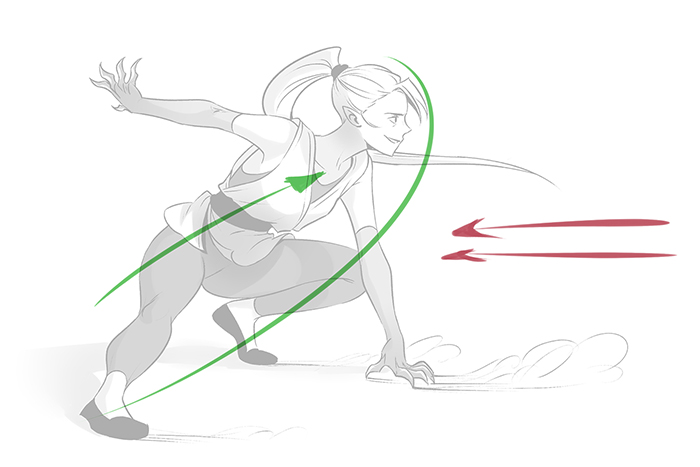
Notwithstanding, this girl wants to overcome this forcefulness with her ain strength. She has no intention of losing the fight.
Example three:
This time, our graphic symbol is a baseball game player. He's spinning his body to get enough momentum and counter the ball'due south force to hit it far away. Don't you get the impression that information technology will exist a home run even though y'all haven't seen how the scene ends nonetheless? Information technology'south the magic of anticipation. If yous know how to properly handle the strength, rhythm, and action lines correctly, you volition be able to guide the spectator along the path you take set up. This is very important for whatsoever comic creative person.
It's important that you don't overpopulate your cartoon with too many activeness lines, because it could confuse the grapheme's intention, brand the forcefulness go in different directions, and take the accent away from the most important action.
Structure
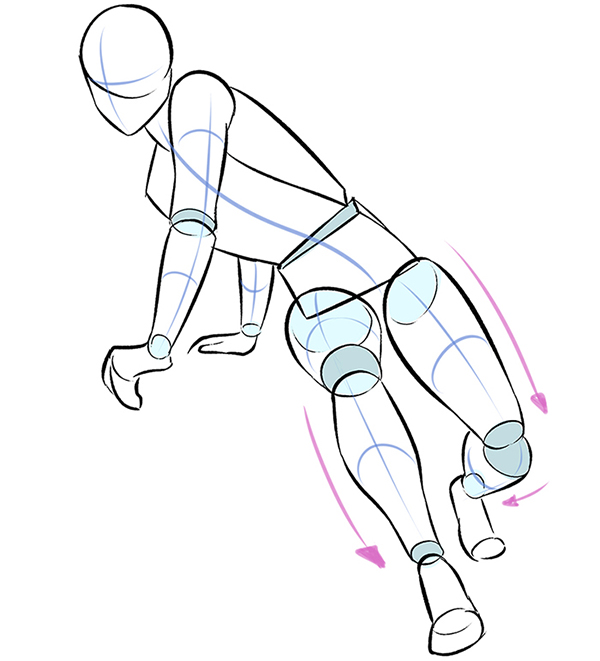
The trunk is quite circuitous and it is hard to depict right proportions and move away from the 2D airplane. I recommend you shape a base that helps you discern the volume of each chemical element. To do this, we will utilize geometric figures such as spheres, cubes and cylinders to represent the structure of the trunk.
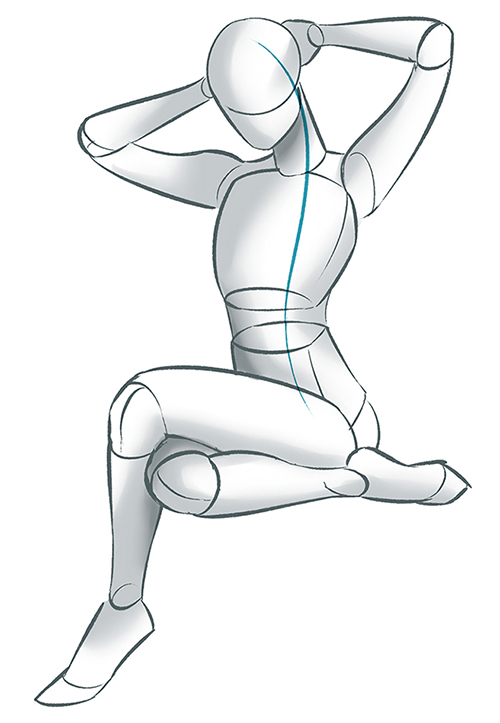
These figures tin be freely rotated, stretched, flexed, and twisted according to the pose.
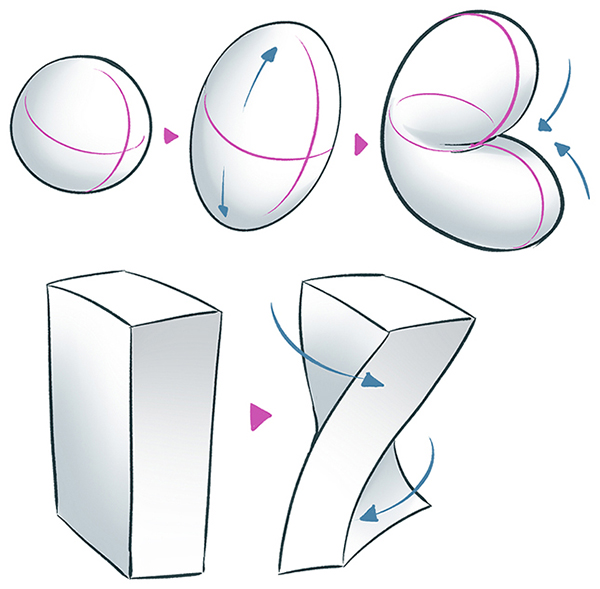
These figures represent the direction of the different elements of the trunk. You must pay special attention to the limits of the joints, since at a certain point you take to turn or twist the trunk to go along moving in that direction, changing drastically the pose.
With do, this process gets simpler. The better you empathise how the figure works, the fewer guides y'all will need.
Perspective
Perspective turns the second plane into a 3D 1 and adds more depth and visual richness to the composition than just looking at it from a frontal aeroplane.
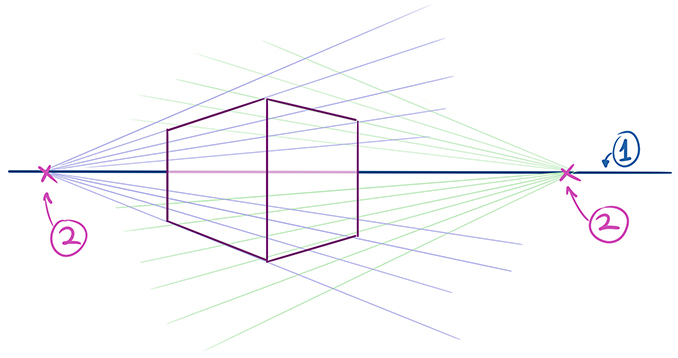
The centre level or horizon line represents the bodily meridian of the viewer'south eyes (one), and the vanishing points are the lines projected from a point on the horizon (2). The following image has a perspective with two vanishing points with which we can capeesh two faces of the figure.
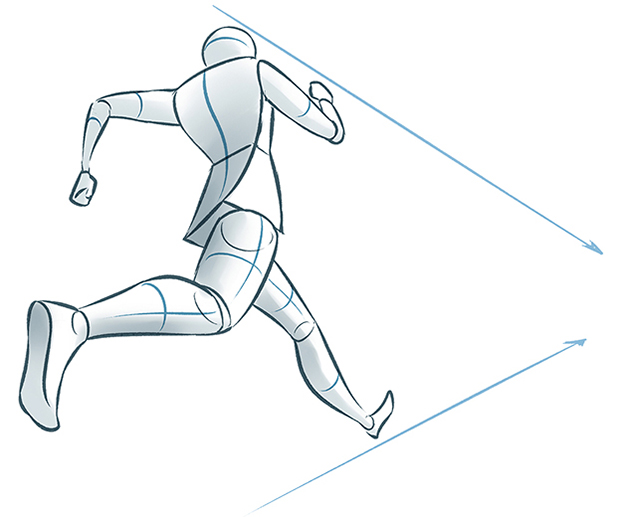
The body is more than intricate, simply the principle is the same. For example, this figure's feet and hands are smaller due to the perspective, and even propose us how nosotros should projection the vanishing point lines.
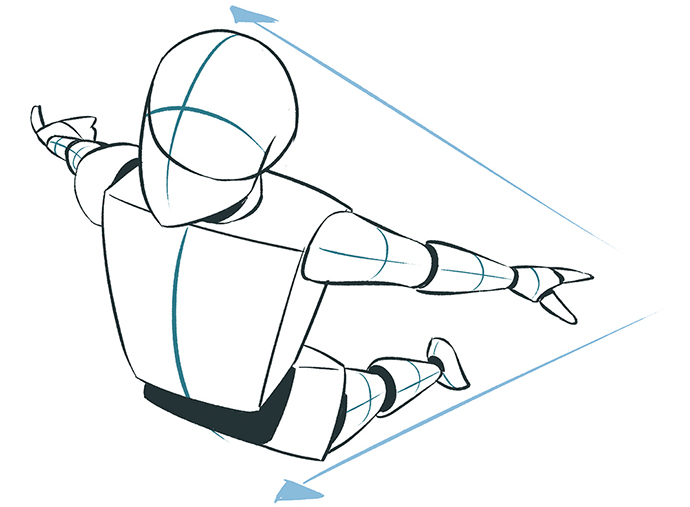
Action poses always look more dramatic when the perspective is exaggerated. Even when the poses are not entirely realistic, the figures seem apparent and the scenes look more than interesting.
I recommend you lot to practice and read well-nigh perspective every bit much as possible, as it is non something you lot can chief in a day. Analyze equally many references every bit you lot can. Eventually, you'll end up seeing vanishing points everywhere.
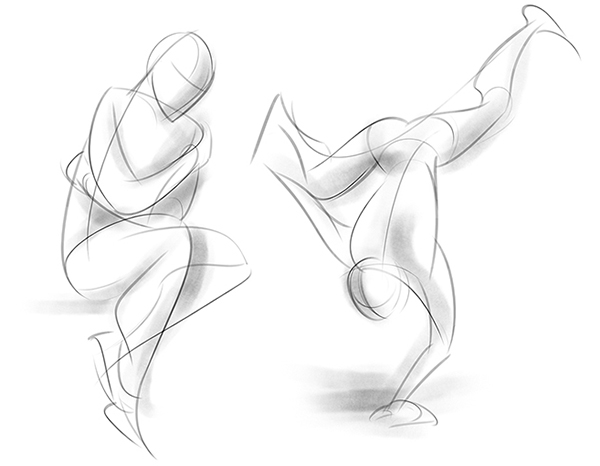
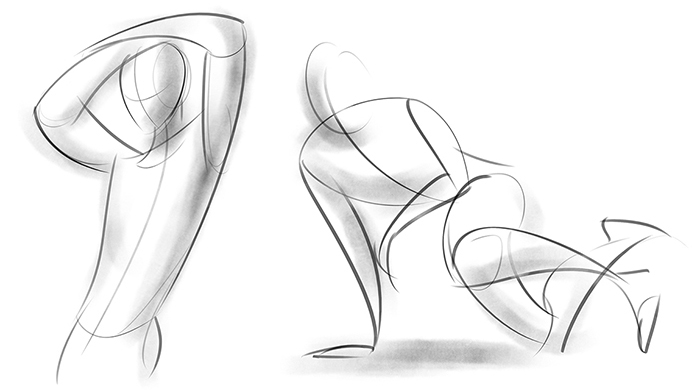
Essential lines
You can speed up and improve your observation skills by drawing poses using photos or actual people as a reference and setting a short time limit for it. The aim is to capture the essential data of the effigy and, of course, to draw as many poses as possible.
This practise will also help you to increase your confidence when drawing. Don't exist afraid to draw the starting time line, and even if you lot make a fault, avoid erasing the lines. Try to focus and draw clean, articulate lines.
Below you can see some examples of poses that I have drawn within 45 to 60 seconds:
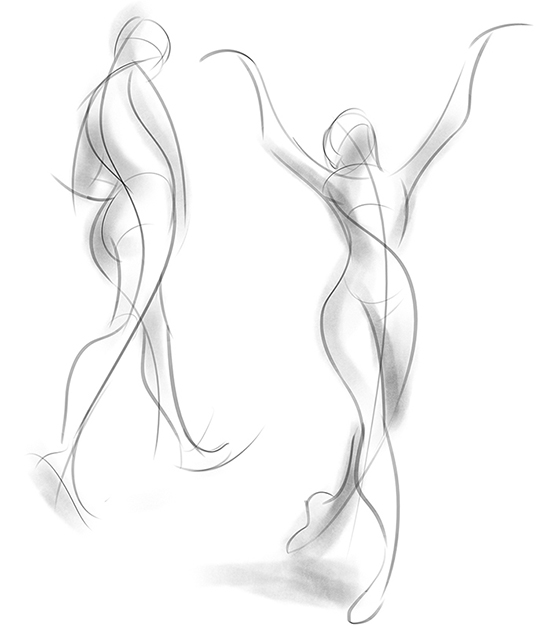
At first, focus on drawing the whole body with smooth lines. So, if you accept more fourth dimension, detail and build the shape better.
Don't be afraid to draw what you don't see or what is hidden, as it will give you lot a better thought of the figure's structure.
Effort to exaggerate the lines. It makes them softer and more than credible, however crazy it sounds.
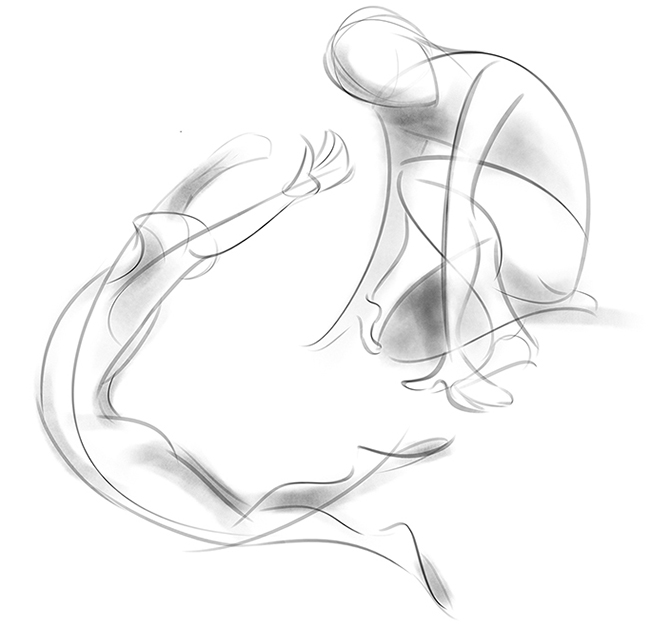
Unless the model is in a very rigid posture, endeavour to avert directly lines. The most natural poses are built with curves.
I promise these tips take been helpful!
If you want to see more of my piece of work, from these links you tin admission my social media pages and my portfolio:
https://www.instagram.com/eri_duh/
https://twitter.com/eri_duh
https://www.artstation.com/eridey
Thank you so much for reading this article!
– Eridey
Source: https://www.clipstudio.net/how-to-draw/archives/156164
0 Response to "how to draw 3d in bluebeam"
Post a Comment