how to draw a 3d guitar step by step
A guitar is a stringed musical musical instrument that can be played by plucking or strumming the strings with fingers. It features a fretted fingerboard, incurved sides, and vi or twelve strings.
There are 2 primary types of guitars: acoustic guitar and electrical guitar. These types can exist further classified into more subcategories. In this tutorial, we will exist drawing an audio-visual guitar.
Nosotros have curated a footstep-past-step tutorial on how to depict a guitar summarized in 9 piece of cake and unproblematic steps. With this guide, drawing a guitar is fabricated easier.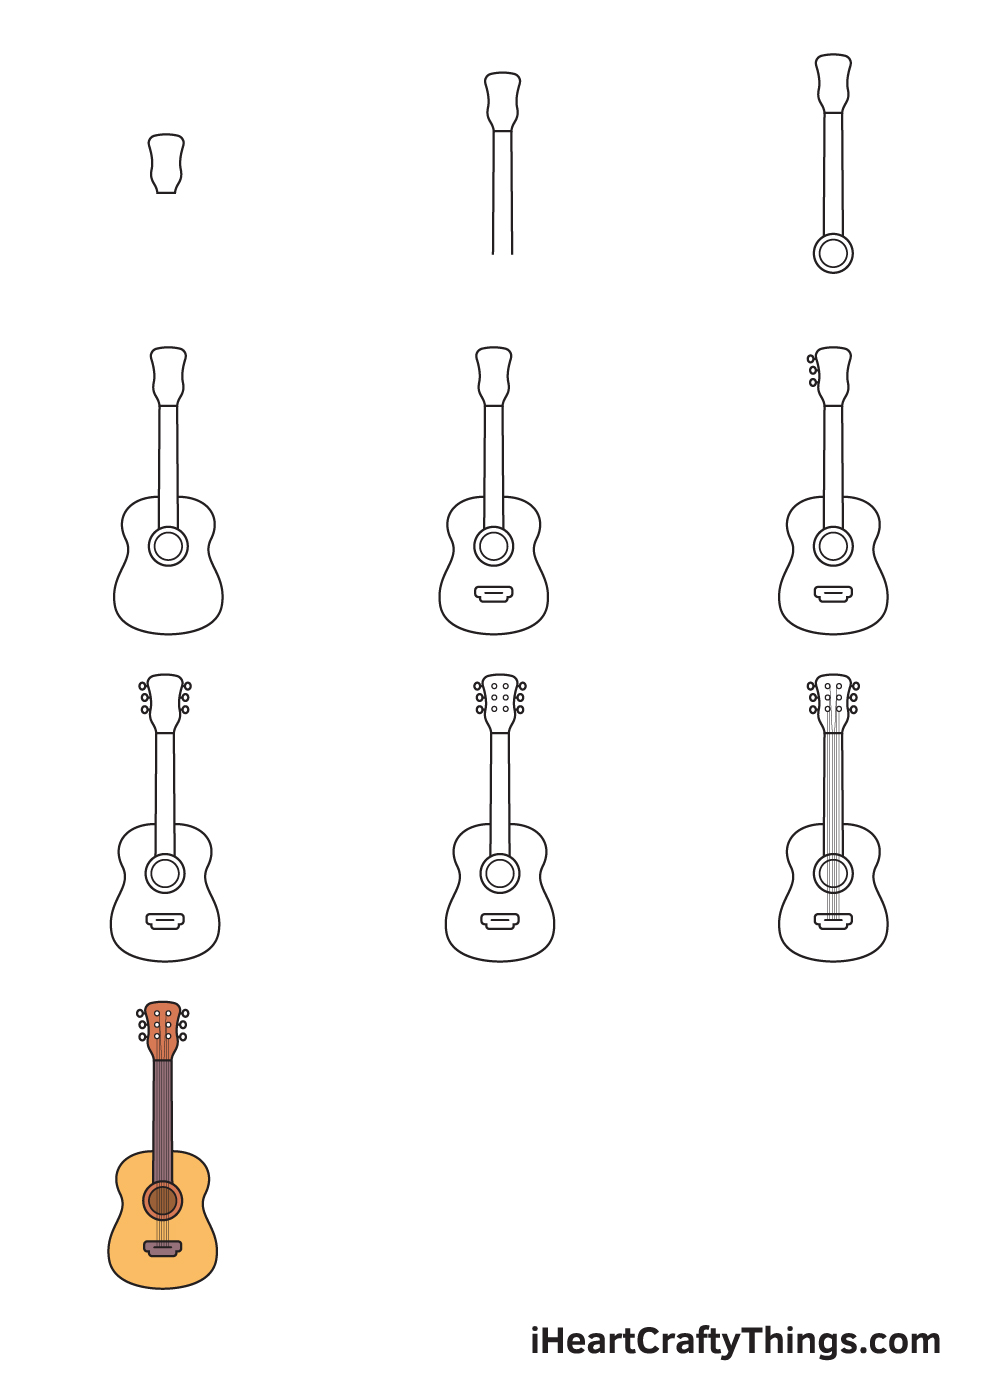
Each step is accompanied with comprehensible illustrations that serve as your visual guide as you follow the instructions. All yous demand is a pen and newspaper and y'all're all set to get started!
Whether yous are a novice or an good in drawing, we're certain you tin can follow these steps effortlessly. What's more, you tin add your ain style and improvise in every step.
Feel free to mix and lucifer colors to customize your artwork and make information technology unique. Let your imagination wander and unleash your creativity. Accept fun and apply your artistic skills!
What's in this Blog Post
- How to Describe a Guitar — Allow'due south get started!
- Step 1
- Step 2 — Draw an Outline of the Headstock and Neck
- Stride 3 — Side by side, Draw the Sound Hole
- Pace 4 — Depict the Entire Body of the Guitar
- Footstep v — Add the Bridge of the Guitar
- Stride 6 — Add the Left Tuning Pegs
- Footstep 7 — Complete the Set of Tuning Pegs
- Stride 8 — Add the Cord Posts on the Headstock
- Step 9 — Draw All the Strings of the Guitar
- Your Guitar Drawing is Complete!
How to Draw a Guitar — Permit's get started!
Step i
On the top eye portion of your paper, depict an outline of the headstock, every bit shown in the illustration. It is the topmost part of a guitar where tuning pegs are located.
To ensure that the outline volition be positioned in the middle correctly, draw a horizontal and a vertical line across the paper to create reference lines. The vertical line above the horizontal line is where y'all should draw the outline.
Step 2 — Depict an Outline of the Headstock and Neck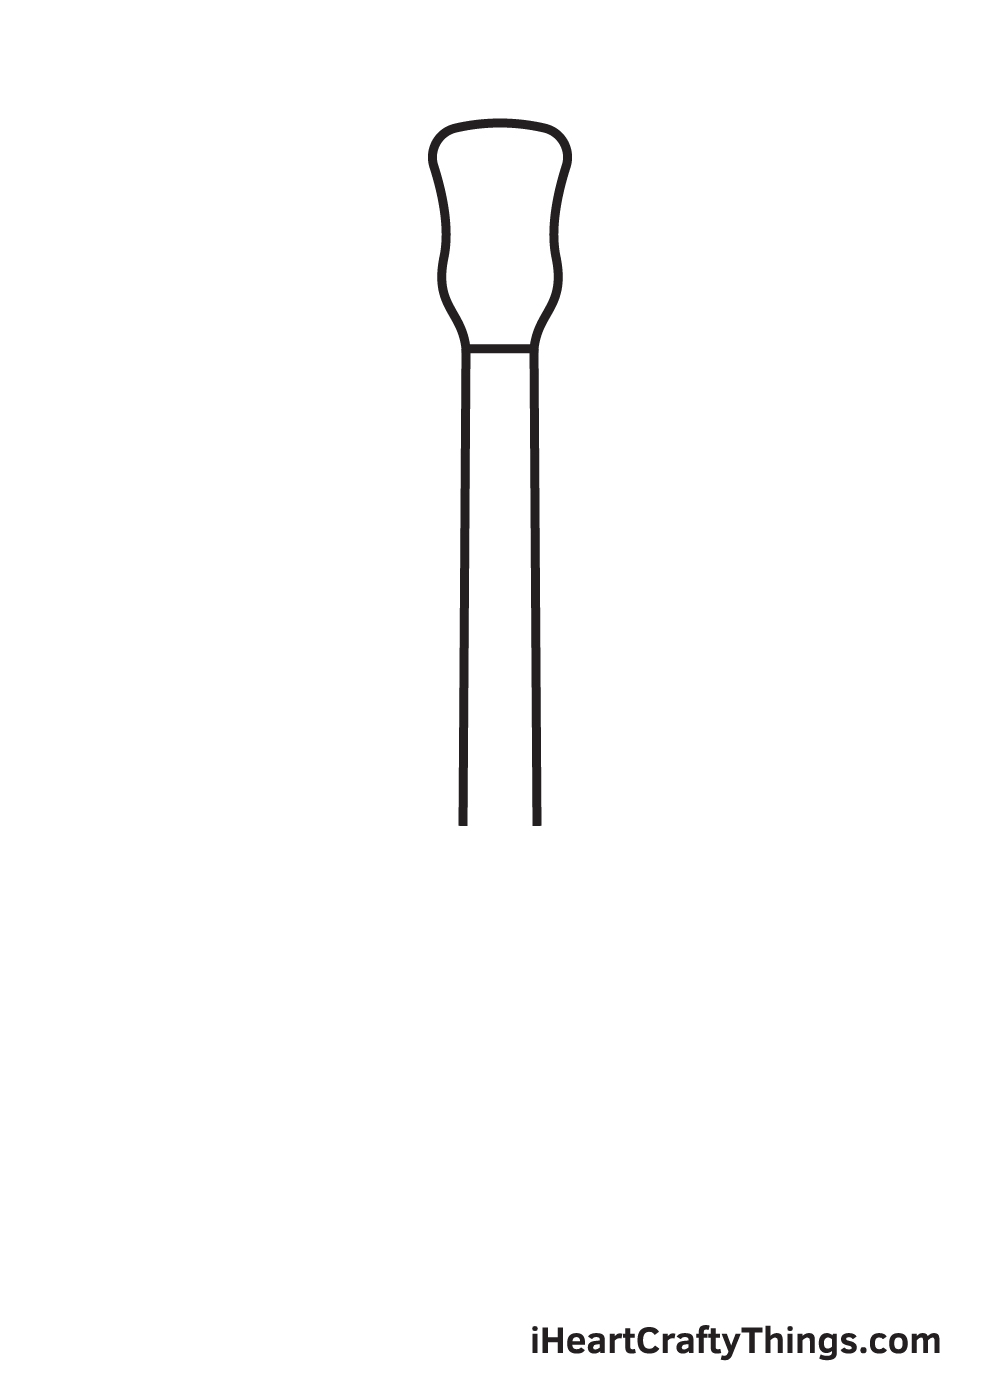
Draw ii long vertical lines right underneath the headstock. The line should be directly connected to the bottom of the headstock, as seen in the illustration.
There should also be a gap between the lines because that's where the strings volition be drawn in the post-obit steps.
Step three — Next, Draw the Sound Pigsty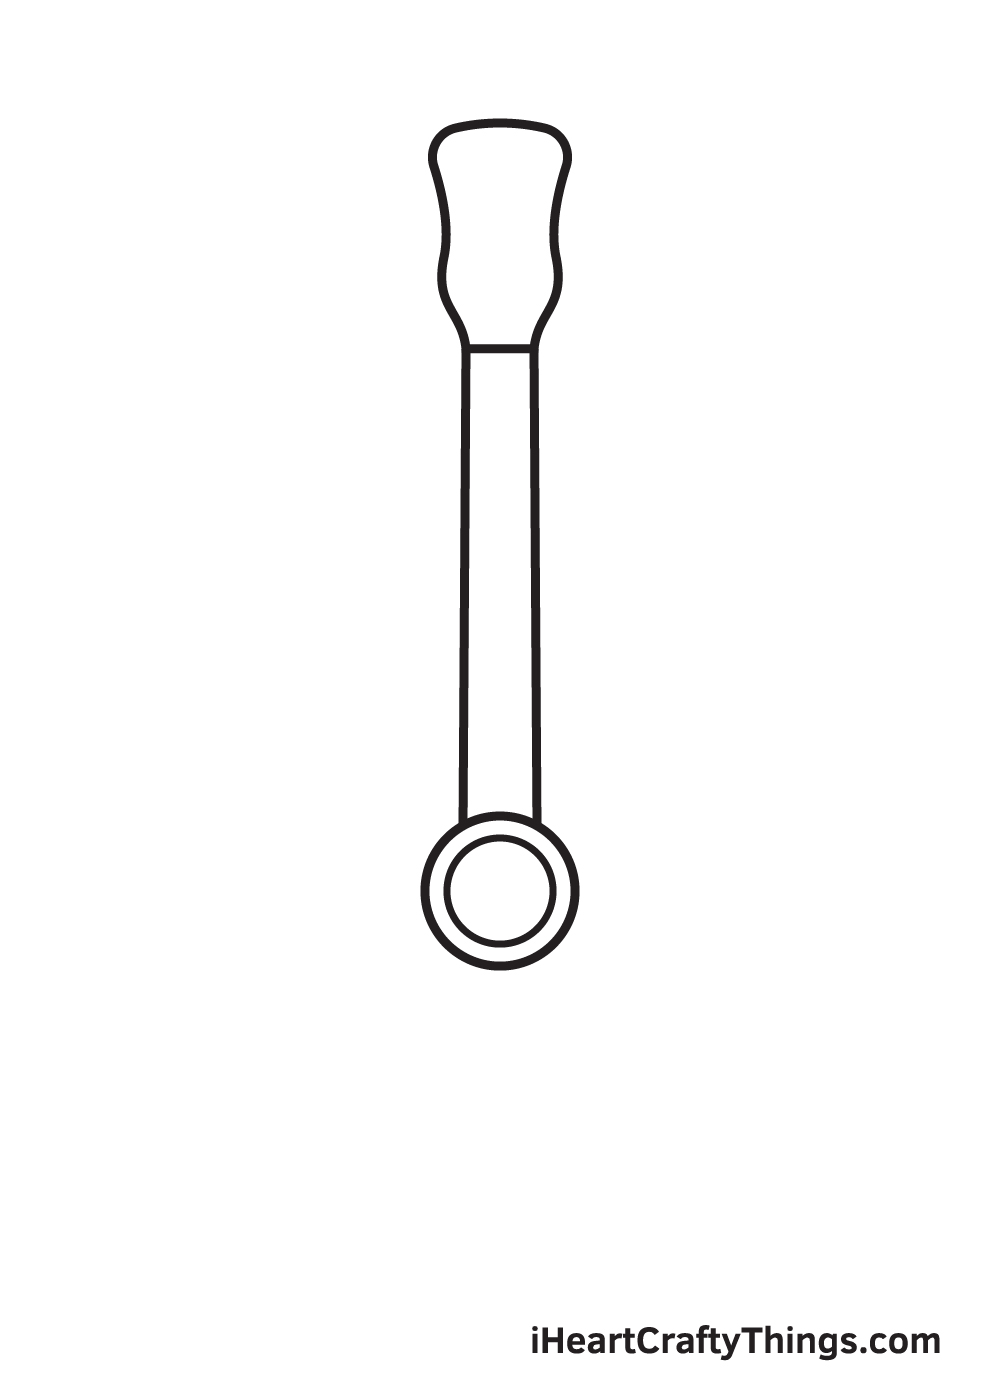
Draw a perfect circumvolve at the lesser of the guitar'due south neck to create the sound hole. Then, inside the circle, draw another circle following the outline of the outer circle.
If you can't freehand a perfect circumvolve, don't worry and feel gratis to use a compass! Information technology is a drawing tool that enables you to draw a perfect circle easily and effortlessly.
Step iv — Depict the Entire Body of the Guitar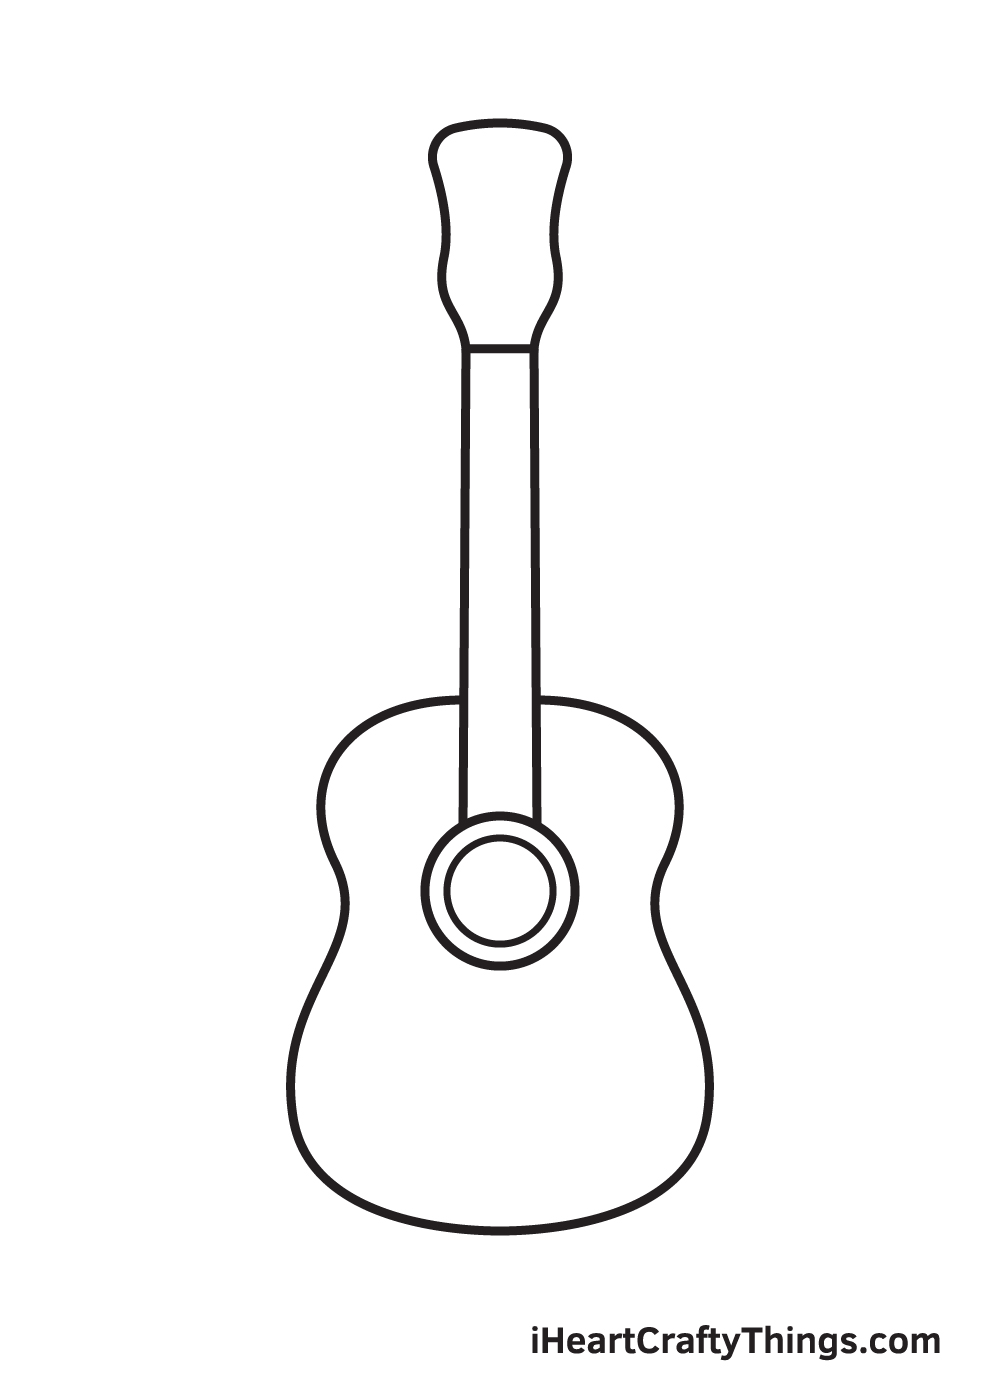
Now that we have finished drawing the outline of the upper portion of the guitar, it'southward time to describe the lower portion to finally complete the guitar'southward outline.
Depict the body of the guitar starting from the cervix all the way further down past the audio hole. A guitar's body should take an upper bout, a waist in the middle, and a lower bout, which is the widest part of the guitar'south body.
Step 5 — Add the Bridge of the Guitar
Below the sound pigsty, draw the bridge by cartoon a horizontal rectangular shape connected with a smaller rectangular shape right underneath information technology.
The bridge should be positioned in the middle in between the audio hole and the edge of the body.
Step 6 — Add the Left Tuning Pegs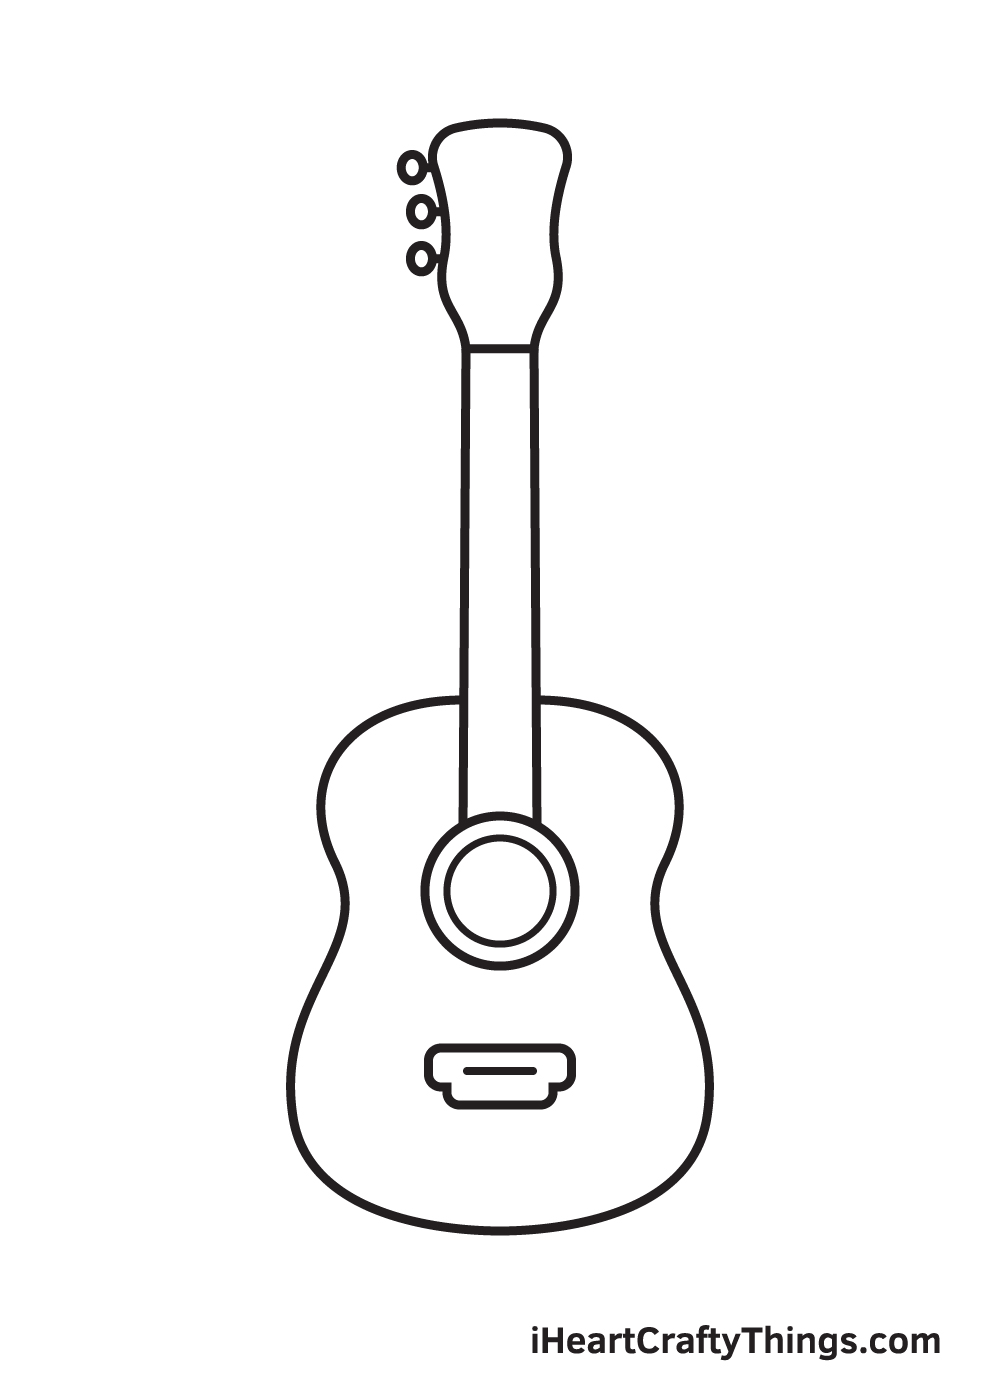
Draw three tiny circumvolve shapes on the left side of the headstock to create the tuning pegs. There should be a slight gap between the pegs and the headstock.
Later on, connect the tuning pegs to the headstock past cartoon short horizontal lines in between.
Pace 7 — Complete the Set of Tuning Pegs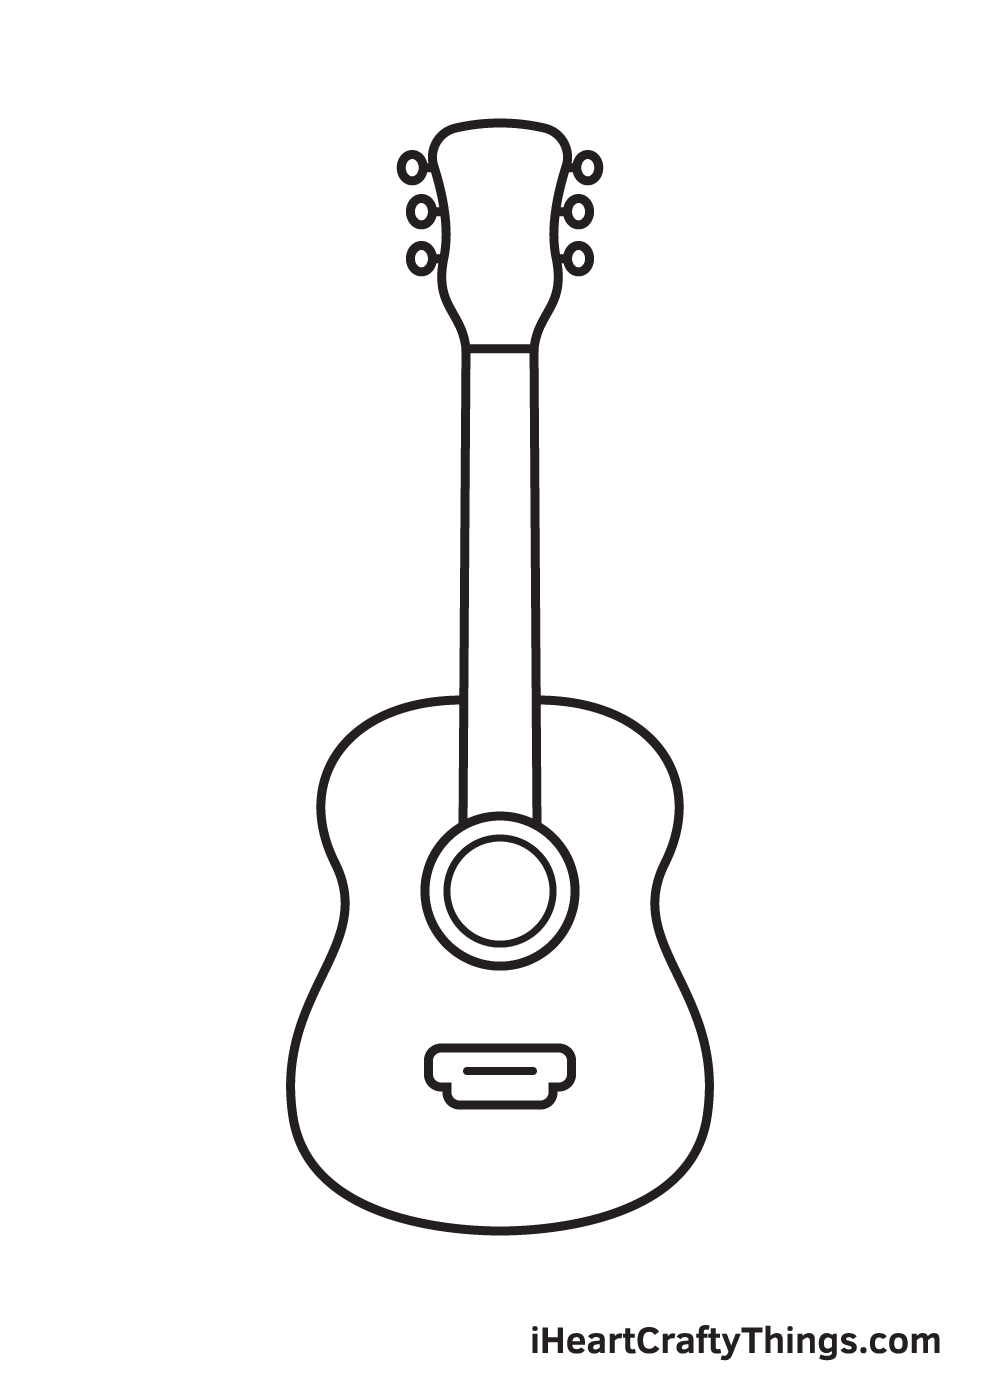
Repeat the previous step on the opposite side of the headstock.
Stride 8 — Add together the Cord Posts on the Headstock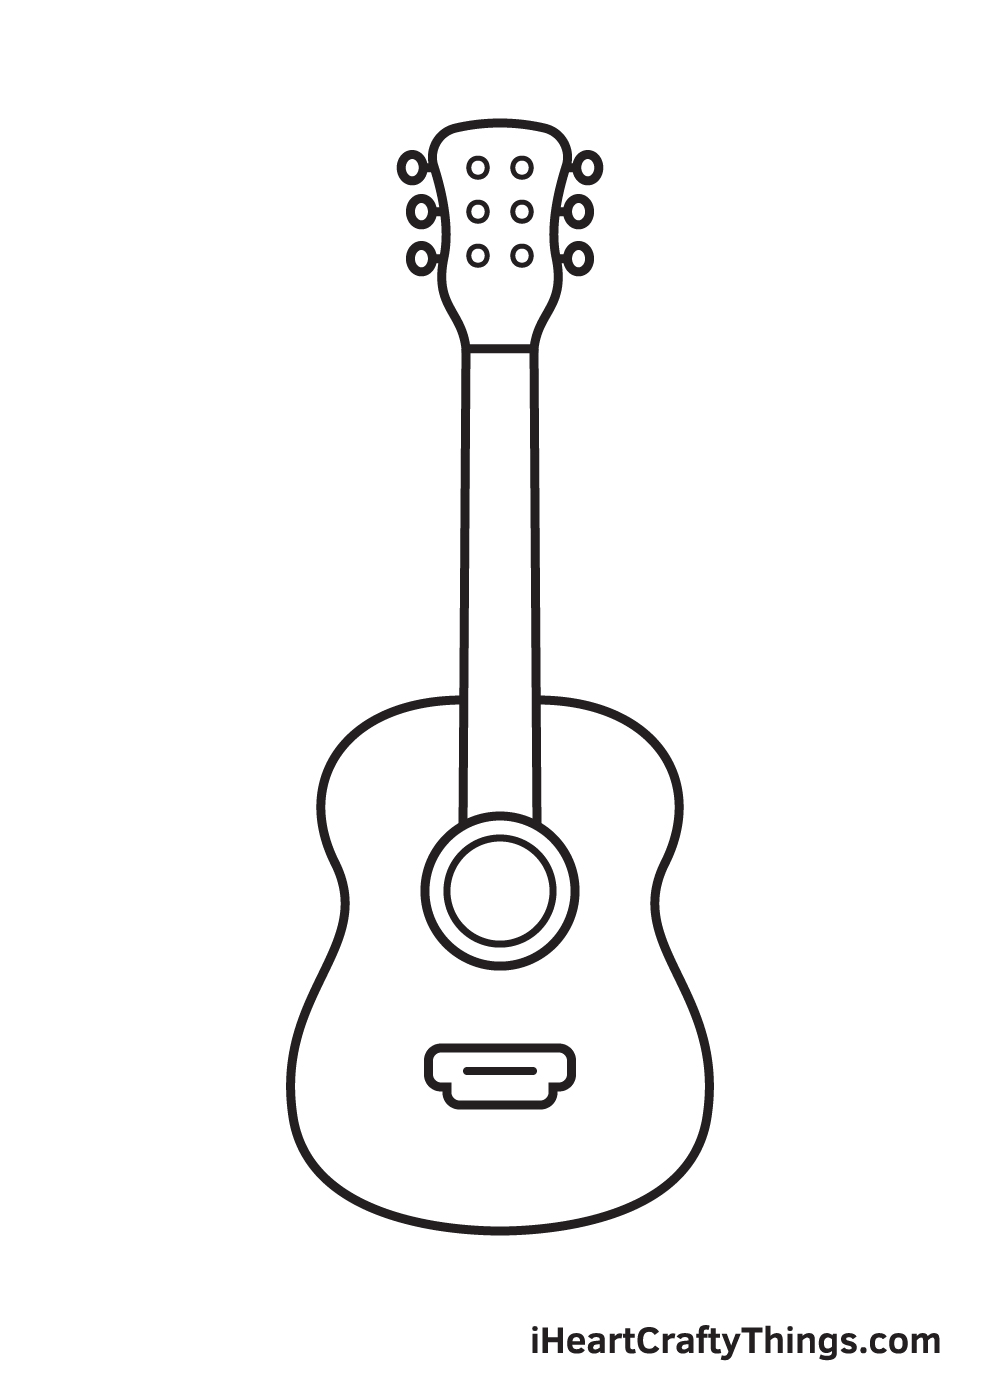
Draw six pocket-sized circles inside the headstock. Each of the circles must exist aligned with each of the tuning pegs.
Step ix — Draw All the Strings of the Guitar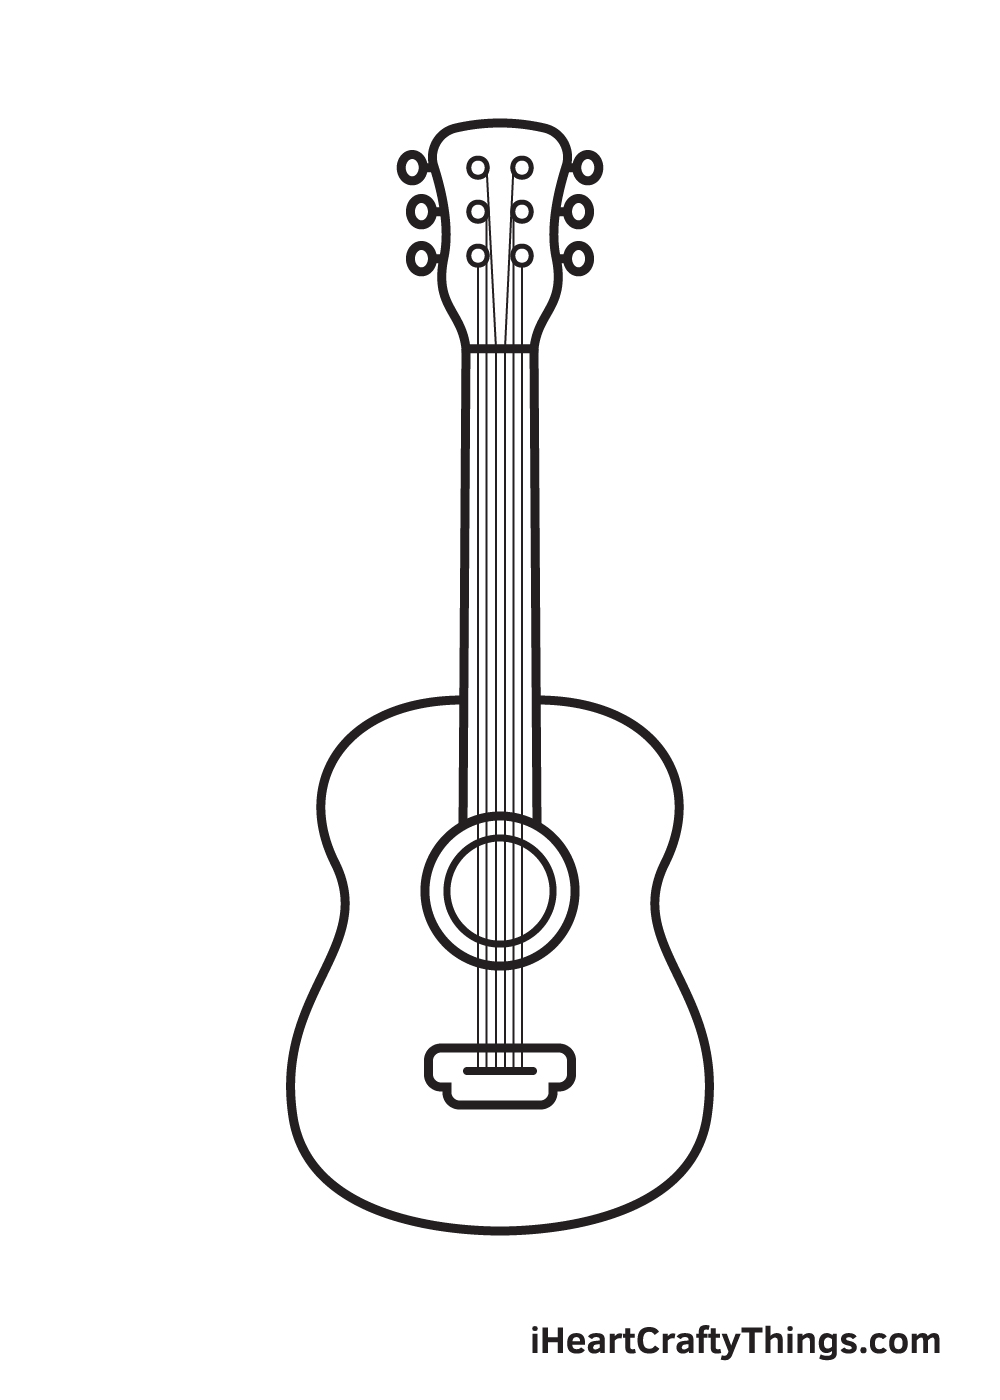
Now, to finally complete the guitar drawing, we will be drawing the six strings of the guitar.
Draw vi vertical lines starting from the circle shapes inside the headstock extending all the style down to the span. Each string must exist fastened to each cord mail in the headstock.
Here, you can encounter the guitar is nigh finished! The only thing it's missing is a nuance of multiple colors to complete your artwork!
Finally, hither is the near exciting function—filling in the colors for your awesome cartoon! This is the part where y'all can show off your artistic skills and your ability to mix and match various colors.
Guitars are made of unlike kinds of wood, such equally mahogany, ash, maple, walnut, and other sturdy and durable wood. Information technology exists in nearly every colour, with black, brown, and foam existence the well-nigh mutual. So, if you have a favorite colour, information technology's probable that at that place is a guitar with that color.
Feel free to color your guitar drawing using whatever colors you lot similar and watch as your drawing ultimately comes to life! And while you're at information technology, why non try experimenting with different coloring materials such as watercolor and brush pens besides?
Your Guitar Drawing is Complete!
We hope yous enjoy this step-by-step tutorial on how to depict a guitar. With this guide, yous can surely describe and color a guitar along with its complex features and elaborate details in no time.
And the most fun part is, you can customize its concrete attributes and play with various colors as much equally you like!
Nosotros are always updating our "How to Draw" catalog, so make sure to keep checking back on our website to accept advantage of newly uploaded tutorials.
All you need is a pen and paper and you're all set to start cartoon! We are excited to see what you will draw next. Nosotros're sure it will be only as amazing as this one!
Once y'all've finished your masterpiece, nosotros're certain you lot must be feeling very proud of yourself—as you should be! Completing this guitar drawing is definitely fulfilling.
Make sure to show off your work of art and share it on our Facebook page and on Pinterest. We're sure it looks amazing! We can't expect to run across your colorful guitar drawing!
Source: https://iheartcraftythings.com/guitar-drawing.html
0 Response to "how to draw a 3d guitar step by step"
Post a Comment